 Back
Back
AI-Powered NPC with MML
Marco Gomez - 2024-12-13
The possibility of having your MML documents communicate with external APIs single-handedly opens up a whole world of possibilities to create immersive functionalities for your virtual world powered by MML.
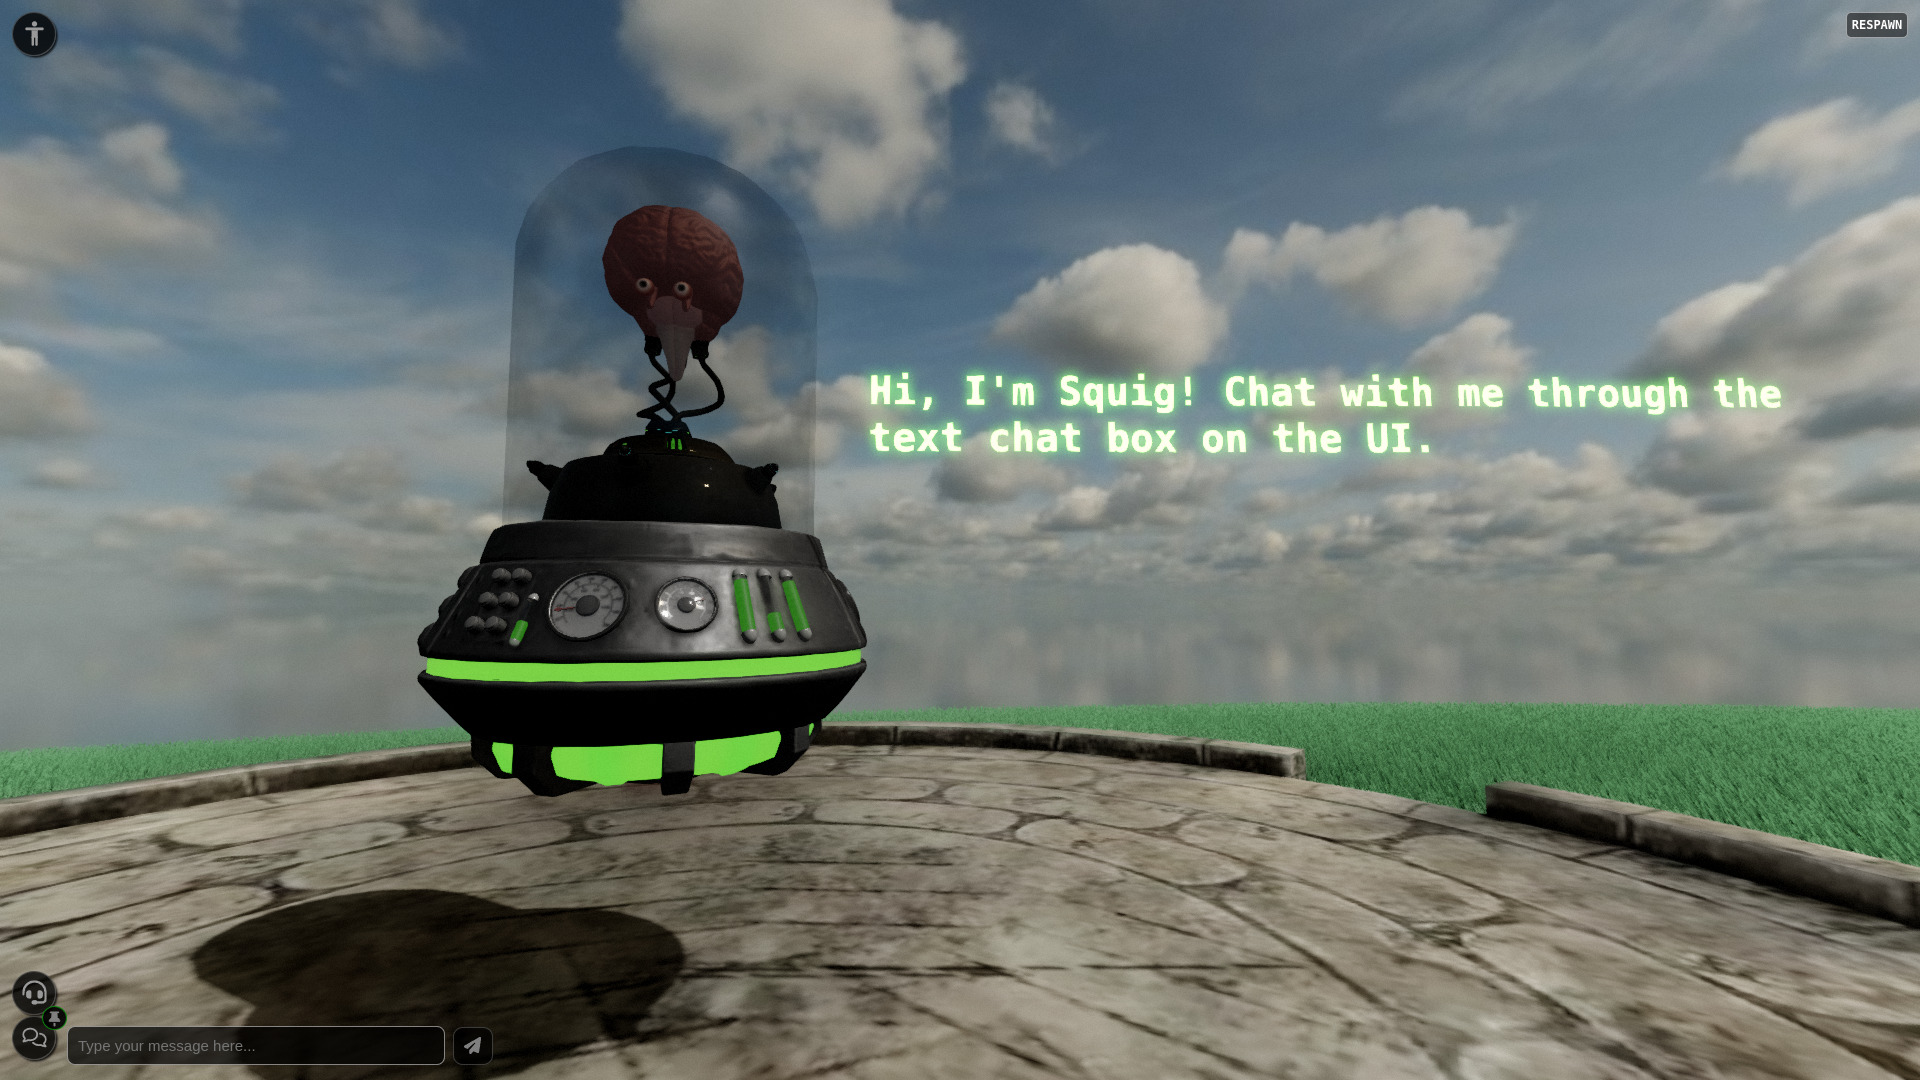
One possibility we will showcase in this Blog Post is the creation of an AI-powered NPC with MML using OpenAI Agents.
The usage of MML allows the same instance of the NPC to be used by multiple users at the same time whilst having the NPC be aware of the identity of the different users.
This allows you to use a ChatGPT model to interact with your users, with an added benefit of being able to give the agent information about your project so your NPC can not only entertain, but also teach your users about your project.
TL;DR:
- You can see a demo of this project here
- You can see the project in the MML Editor
- You can
copy-and-pasteread the source-code from this Gist
Create an OpenAI Assistant
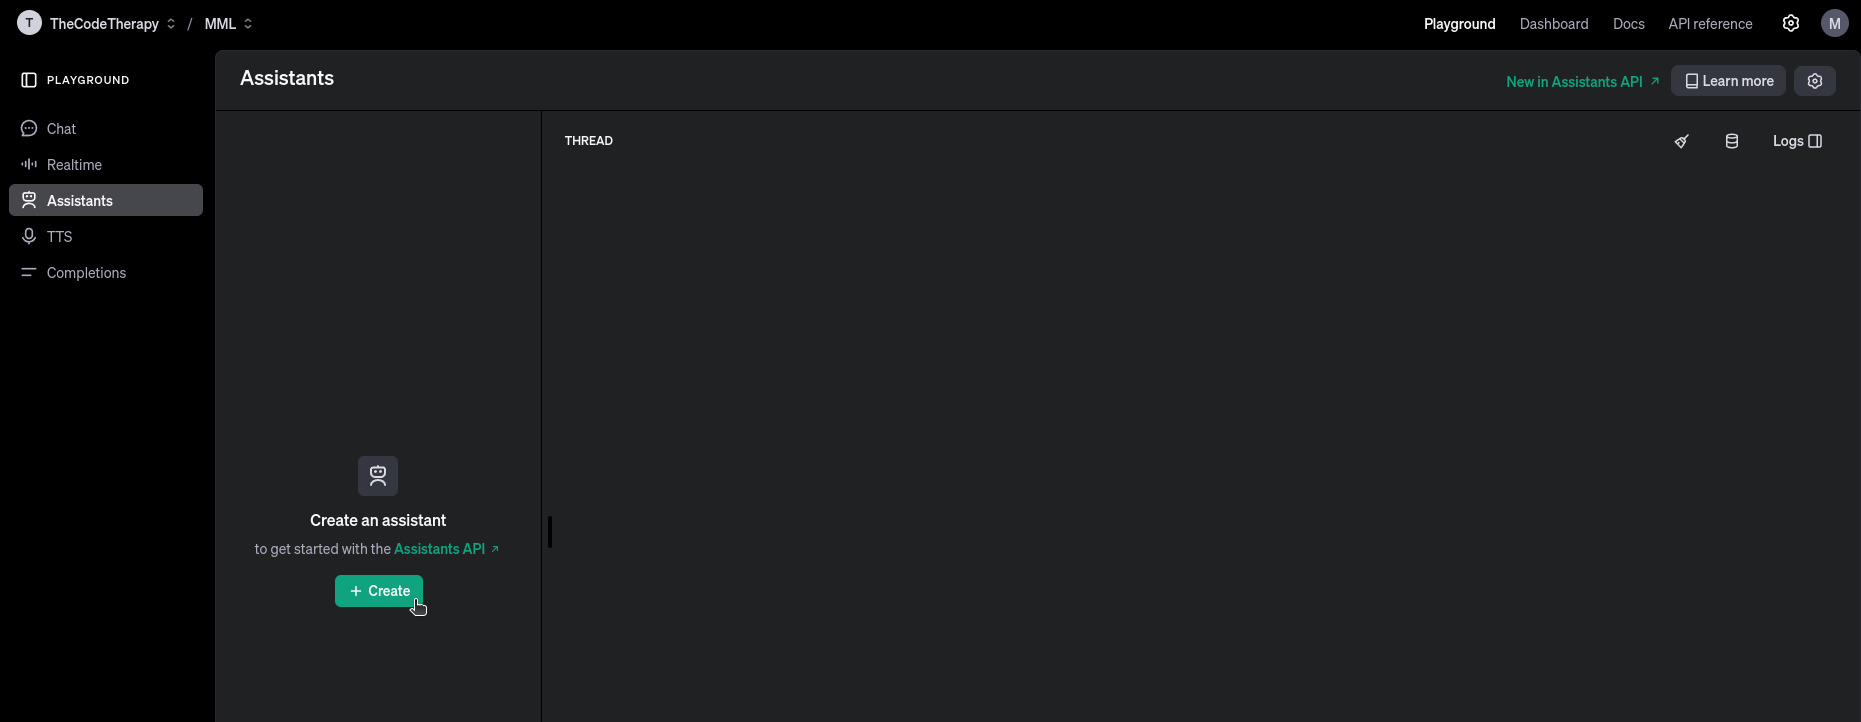
The first step will be to Sign Up for an OpenAI account if you don't have one and access the Assistants page to create your new agent.

Configure your Assistant
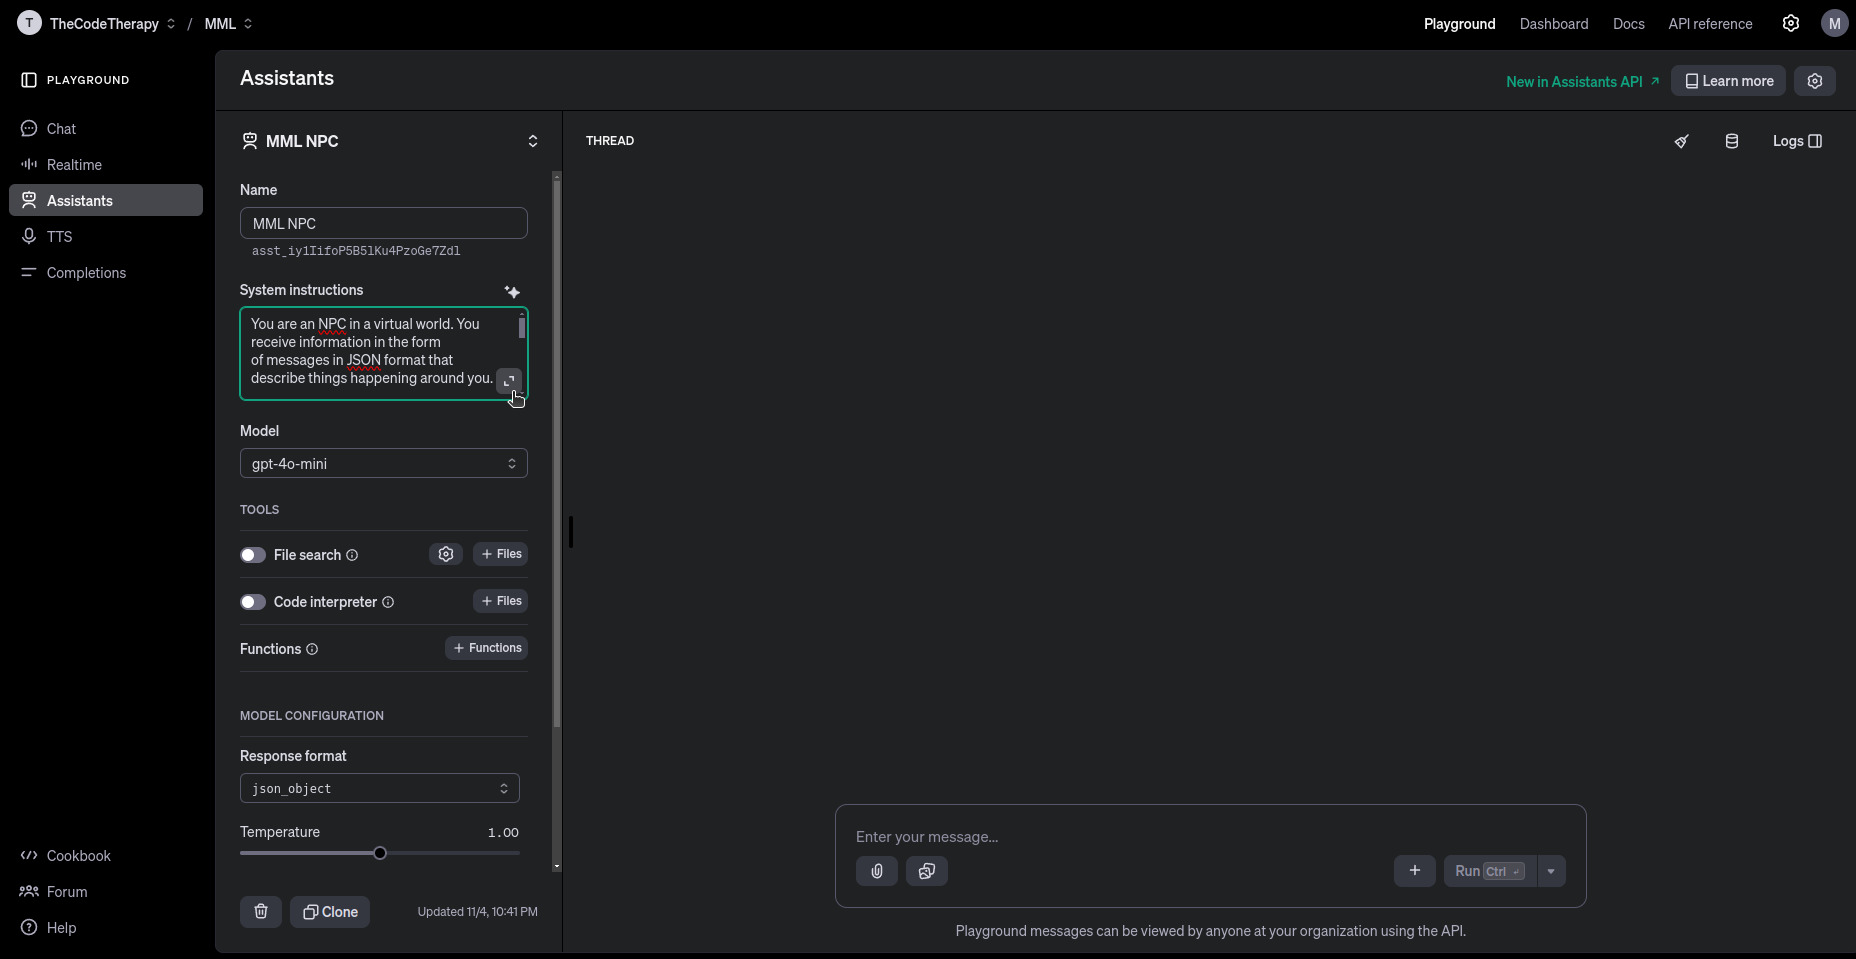
In the left column of the Assistants configuration page (which you'll be able to see in the a further screenshot after following the config steps), you'll have the fields to configure your agent.
-
Name: In the
Namefield, you may pick any name for your Assistant. That won't be visible to your users, nor will it influence the assistant functionality. It is there just to make this assistant findable in case you have multiple assistants.Right under the
Namefield, you'll be able to see yourAssistant ID, which you can click to copy. This ID will be important later so we can configure your MML document to use it for your NPC requests. -
System instructions: The
System instructionsform is the most important part of this configuration. It is in this field you must describe what your assistant's behavior should be and how it should respond to your users.In this form, you can describe your assistant's personality and also give it further instructions for how to play its role.
Once you click the little diagonal arrows in the bottom-right corner of this form, it will expand so you can edit the text for the System Instructions, and there you'll also find a
Generatebutton in case you want to try, which is an assisted/guided way to compose your system instructions. For the sake of this tutorial, please find below an example you can use as theSystem instructionsfor your assistant:
Please keep in mind that you may include much more information to your assistant in this form. You may add any knowledge you'd like your NPC to have and also allow it to have many more actions, as you may easily create the functions in your MML document for your NPC to perform the actions it was instructed to be capable of doing.
-
Model: The
Modeldrop-down selector will allow you to pick which ChatGPT model you want to use for your assistant. Please keep in mind this choice will influence not only the cost of each request but also the time necessary for the Assistant to reply and the number of tokens (text) it is capable of handling or "remembering" in the context of its chat with your users. -
Response format: The
Response formatis paramount for this particular guide to work, and it must be set tojson_object. That is not mandatory for you to create an MML NPC using OpenAI Assistants, but only the way the example created for this particular guide was structured.As you may have noticed, in the
Toolssection of the Assistants configuration page, there is aFile searchfunctionality that you may use to add files (like .pdf documents, markdown files, text documents, etc) so your NPC can consult to answer about specific topics described in such documents. However, we decided not to use this functionality for this particular example, as the agent tends to reply with citation marks informing where in such documents it found any given information, which would not be so useful for the particular type of NPC we decided to create for this guide. You may feel free to explore such functionality, however, keep in mind that for now you can't use this functionality while having theResponse formatset tojson_object, which is necessary for this particular guide to work.
Please see the screenshot below for a reference of how your Assistant configuration should look:

Creating your NPC MML Document
Let's start diving in to the bits of the MML document that are paramount for the NPC's core functionality while keeping everything multi-user friendly.
The requests queue
Our first concern should be to keep everything multi-user friendly, and for that we must have a queue and all the book keeping necessary so we won't waste any chat messages when the NPC is already busy replying to some previous chat message sent by another user.
For that, we create some variables to store the necessary states:
Here's how it works:
queuedMessages: holds all the incoming messages (messages captured by them-chat-probe) that need to be sent to OpenAI;
Submitting Messages to the Queue
Whenever a user sends a message to the NPC through the text chat, it gets captured by the m-chat-probe, and it's added to the queue using the submitMessage() function. This function also triggers the processing function (onQueue()) if no other message is currently being processed.
In this function:
-
The message object includes important information like the
messagecontent,userID, thetimestamp, and a list ofnearbyUsers; -
queuedMessages.push()adds the new message to the queue; -
onQueue()starts the process of sending messages if the NPC isn't already busy.
Processing the Queue
The heart of the queue system lies in the onQueue() function. This function checks if there's an ongoing request and, if not, initiates the message-sending process.
Here's what's happening:
-
latestPromiseis used to track the current request. If it's null, it means no request is being processed, so we can proceed to process a new one; -
sendMessages()is called to handle the current message to be handled by the queue system; -
finally()ensures that once the request is completed,latestPromiseis reset, and the function checks if there are more messages to process. If there are, it calls itself recursively to continue processing the queue.
This setup ensures that messages are processed one at a time, maintaining the order they were received in and preventing any message loss.
Sending Messages to OpenAI
The sendMessages() function is responsible for sending queued messages to OpenAI through an API request.
What's happening here:
-
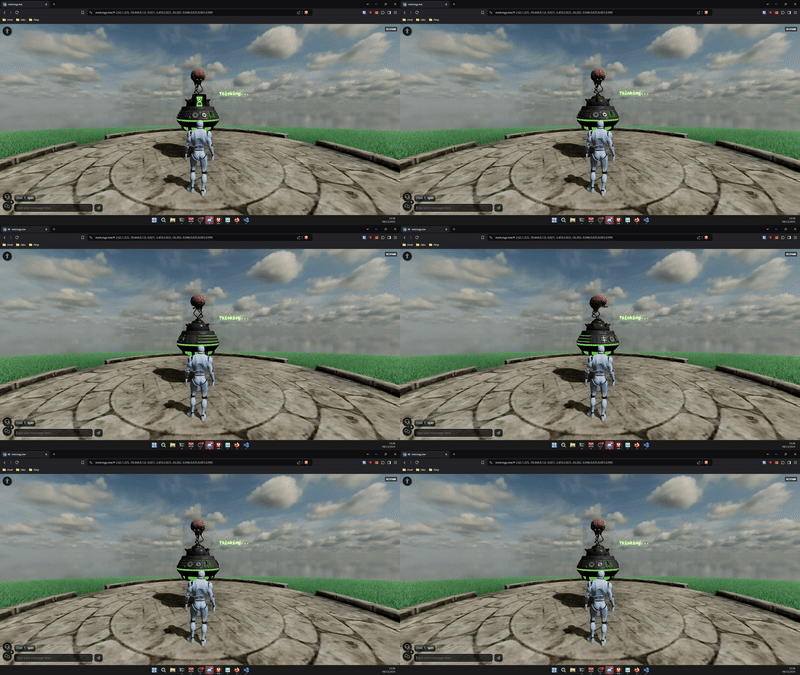
showWaiting(): Displays a "Thinking..." indicator while the NPC waits for the response, in case it is not speaking another response yet; -
const message = queuedMessages.shift();gets the next message to be processed and removes it from the queue; -
fetch(): Sends the request to OpenAI, using the assistant ID and maintaining the context of the conversation through a thread; -
Response Parsing: The response is split into lines and parsed. It then looks for the
thread.messageobject, which contains the actual reply; -
completionLineandcompletion: Once we finish parsing the response, we remove unwanted markdown instructions and unwanted characters using.replace, and we'll finally be able to parse the JSON object that the agent sent back and assign it to thecompletionvariable, and it will contain the message to be spoken (.message) and eventually actions (.action) that the NPC should perform (likespin,thumbs_up,thumbs_down, andblow_horn); -
completion.message: When we have acompletion.message, we invoke thecreateSpeechWithTimeoutfunction passing it as an argument, and that function will return thedataUrlcontaining the audio to be played, and thedurationof the same audio; -
dataUrlandduration: If we check that we obtained both the audio and its duration, we then invoke thegrowWhileSpeakingfunction with thedurationargument to scale up our NPC during such time interval, and theplayAudiofunction, that will also use the duration argument so it can hold up the logic execution until the audio finished playing; -
finally: Once we reach thefinallystatement of thetryblock, we callhideWaitingfunction to remove the visual indicator that shows our NPC is working, and we check if there are other messages to be processed, and if so, we recursively invoke thesendMessagesfunction again, andawaitfor its execution to finish, and repeat the process until there are no more queued messages to be processed, which will bring our NPC to an idle state again until another user interaction happens.
Text-to-Speech: Giving Voice to your NPC
After setting up the message queue and integrating the OpenAI API for text responses, the next step is to bring the NPC to life with voice synthesis. For this, we use OpenAI's Text-to-Speech (TTS) API. The NPC's responses aren't just shown as text; they're also spoken aloud, making the interaction more engaging and immersive.
-
Generating Speech with OpenAI TTS API:
To create audio responses, we use the
createSpeech()function. It sends the response text to the TTS API and retrieves an audio file (MP3) that we can play back in the virtual world.Explanation:
-
API Request: The function sends a POST request to OpenAI's TTS API with the input text (tts), requesting an MP3 response
-
Audio Blob: The response is retrieved as a binary blob and converted into an ArrayBuffer for further processing;
-
Duration Estimation: The duration of the MP3 file is estimated to control the playback timing (more on this in the next section);
-
Base64 Encoding: The MP3 file is encoded as a Base64 data URL, making it easy to play in the browser without needing to save a file;
-
The return: this function returns the generated audio and also its duration, so we can await for the end of the audio playback before we start processing the next message.
-
Handling Timeout with Speech Generation
To avoid the NPC getting stuck if the TTS API takes too long to respond, we wrap the createSpeech() function with a timeout using createSpeechWithTimeout():
Explanation:
-
Promise.race(): This method runs both the speech creation and the timeout in parallel. If the TTS API call takes longer than thecompletionTimeout, the timeout promise rejects, and we handle the error gracefully; -
Error Handling: If the timeout occurs, it logs a warning message, preventing the NPC from getting stuck waiting for a response.
This mechanism ensures that the NPC remains responsive, even if the TTS API is slow or unresponsive.
Estimating the MP3 Duration
To synchronize animations and audio playback, we need an estimate of the MP3 file's duration. This is handled by the estimateMP3Duration() function, which analyzes the contents of the MP3 file.
Playing the Audio
Once the audio is ready, it's played using the playAudio() function. This function also manages the volume and ensures that the NPC can process the next response once playback is complete.
Explanation:
-
Setting Attributes: The audio element (agentAudio) is configured with the source URL and playback timing;
-
Volume Control: The volume is adjusted and it's set back to zero after the audio finishes playing to make sure any timing issues won't be perceptible;
Animating and Bringing the NPC to Life
In addition to responding with text and voice, the NPC in our MML world can also perform various animations and actions that make it more expressive and engaging. These actions range from simple gestures like a thumbs up to more elaborate animations like spinning around. The code for handling these animations is tightly integrated with the NPC's response logic, allowing the NPC to react in fun and dynamic ways based on user input or AI-driven commands.
In this section, we'll break down all the functions responsible for handling NPC actions and animations.
Animating Elements with animate() Function
At the core of the animation system is the animate() function, which handles attribute-based animations for any element in the MML document. This utility function is used by most of the specific action functions.
Explanation:
-
Attribute Animation: Creates an
m-attr-animelement to animate a specified attribute (e.g., position, scale, rotation); -
Easing: Supports easing functions for smooth transitions;
-
Cleanup: The animation element is removed after the animation is complete to avoid cluttering the DOM.
This is a very handy utility function that can be used in other MML documents, as it allow us to animate any element in the scene by simply specifying the target attribute and desired values.
Spinning the NPC
The spin() function triggers a full 360-degree rotation animation, making the NPC spin around in a playful way. This action can be used as a response to user commands or AI-generated actions.
Explanation:
-
Audio Playback: Plays a spinning sound effect using the
spinAudioelement that lasts 6 seconds; -
Rotation Animation: Animates the
ry(rotation around the Y-axis) attribute of theactionsWrapperelement for a 1800 degrees spin during 3.5 seconds, with aneaseInOutQuinteasing function; -
Volume: As usual, we set the volume back to zero once we estimate the playback is complete, to prevent any possible timing issues from creating audio stuttering or undesirable side-effects;
This action makes the NPC appear energetic and responsive, adding a sense of liveliness.
Thumbs Up Animation
The thumbsUp() function animates a thumbs-up gesture, making the thumb model grow and rotate to convey approval or positive feedback.
Explanation:
-
Scaling Animation: The thumb model scales up in size to give the impression of a thumbs-up gesture;
-
Rotation Animation: Rotates the thumb model to align with a thumbs-up position;
-
Reset Animation: After 5 seconds, the thumb model scales back down and returns to its neutral rotation.
This gesture provides visual feedback for positive actions or responses, making the NPC feel more interactive.
Thumbs Down Animation
Similar to the thumbs-up gesture, the thumbsDown() function animates a thumbs-down gesture.
Explanation:
-
Scaling and Rotation: Scales and rotates the thumb model downward to indicate a thumbs-down gesture;
-
Reset Animation: After 5 seconds, the thumb returns to its neutral state;
This gesture is used for negative feedback, allowing the NPC to respond visually in a playful way.
Playing the Horn
The playHorn() function animates the horn model and plays a sound effect, making the NPC blow a horn as a fun or celebratory action.
Explanation:
-
Audio Playback: Plays a horn sound effect using the hornAudio element;
-
Scaling Animation: The horn model scales up to simulate the NPC blowing a horn;
-
Volume Fade-Out: Lowers the volume after the animation is complete;
This action is great for celebratory moments or playful interactions with users.
Growing the NPC While Speaking
The growWhileSpeaking() function animates the NPC model to grow slightly when it speaks, giving a visual indication of speech and making the NPC look more dynamic and alive.
Explanation:
-
Scaling Up: The NPC model scales up slightly when it starts speaking;
-
Scaling Down: After the speech is complete, it scales back down to its original size.
This subtle animation provides a visual cue that the NPC is talking, making it feel more natural and alive.
Proximity Detection and State Reset
To make the NPC feel interactive and responsive, it's essential that it reacts dynamically based on the users' proximity and context. This is achieved using two key MML components: the position probe (m-position-probe) and the chat probe (m-chat-probe). These allow the NPC to detect when users enter or leave its interaction range, listen for nearby chat messages, and manage its internal state accordingly.
Additionally, there is a mechanism to reset the NPC's state when no users are nearby or when it hasn't received a message for a certain period. This helps prevent the NPC from getting "stuck" and keeps the experience smooth and seamless.
Let's break down the code and explain how each part contributes to these functionalities:
-
Setting Up the Probes:
The MML document defines two probes that handle proximity detection and chat messages:
Explanation:
-
m-position-probe: Detects users within a 10-meter range of the NPC. It tracks users entering, moving, and leaving this proximity; -
m-chat-probe: Listens for chat messages sent by users within a 10-meter range. This probe captures the content of the chat and the user's connection ID;
These probes make the NPC aware of its surroundings and allow it to interact with nearby users effectively.
-
-
Tracking Nearby Users with the
proximityMap:To keep track of users in the NPC's vicinity, there is a
Mapobject calledproximityMap. This stores the connection IDs of nearby users and their positions.Explanation:
-
proximityMap: Stores the connection ID and position data of each nearby user;
-
latestProximityActivity: Keeps track of the last time a user entered or moved within the NPC's proximity range. This helps determine when to reset the NPC's state if no users are nearby.
-
-
Handling Proximity Events:
The position probe emits three types of events:
positionenter,positionmove, andpositionleave. Each event updates theproximityMapaccordingly.Explanation:
-
positionenter: Fired when a user comes within range of the NPC. The user's connection ID and position are added toproximityMap; -
positionmove: Fired when a nearby user changes position. The user's position data inproximityMapis updated; -
positionleave: Fired when a user leaves the proximity range. The user's connection ID is removed fromproximityMap; -
disconnectedwindow event listener: detects if a user left the experience (closed the window) and, if so, removes the user from theproximityMap.
These event listeners make the NPC context-aware, allowing it to adjust its behavior based on who is nearby.
-
Listening for Chat Messages
The chat probe captures chat messages from users within range and forwards them to the message queue for processing.
Explanation:
-
latestMessageTime: Tracks the time of the most recent message received. This helps determine if the NPC should reset its state due to inactivity; -
submitMessage(): Sends the captured message to the queue, where it will be processed by the NPC;
This setup allows the NPC to respond only to users who are close by, creating a more personal and immersive experience.
Resetting the NPC State:
To prevent the NPC from getting stuck in a particular state (e.g., "Thinking..."), there is a a mechanism to reset its state when there are no nearby users or when it hasn't received a message for a certain duration.
Explanation:
proximityMap.size: Checks if there are any users currently in range;- State Reset: If there are no users nearby for more than 10 seconds, or if there hasn't been any message activity for over 60 seconds, the NPC resets its state;
latestPromiseandqueuedMessages, are cleared;- The NPC's label content is reset to the initial greeting (
initialText). This mechanism ensures that the NPC remains responsive and doesn’t continue to display outdated or irrelevant information.
Periodic State Check:
To regularly check the proximity and message activity, there is a simple interval-based function.
Explanation:
The checkIfHasNearbyUsers() function is called every second to evaluate the NPC's state.
This periodic check helps keep the NPC in sync with the environment and ensures it resets when needed.
By integrating proximity detection and state-reset mechanisms, the NPC becomes highly context-aware and adaptive. It can detect when users are nearby, respond to their messages, and gracefully reset its state when interactions fade. This design prevents the NPC from getting stuck or becoming unresponsive, creating a fluid and engaging experience for users in the virtual world.
If you want to copy-and-paste read the complete source-code, you can find it here: MML-powered-NPC.html
You're all set!
Have fun with your AI-powered MML NPC! 🎉
